The key to all doors. Doorphone key emulator
Here are collected your favorite questions about access keys, given basic knowledge about types of keys, as well as common misconceptions, myths and legends from this area. Feel free to ask questions, friends.
And I want to recommend a very interesting and useful resource dedicated to copying keys - Intercom Master 2009. The articles contain unique information, presented extremely clearly.
Is it possible to program a key for two doorphones ()?
Answer: Yes, you can. The key can be registered in any number of intercoms or controllers with it.
More details: Many people think that when programming the key, some kind of record is made in it, and if the key is programmed in the entrance doorphone, then the key is no longer empty and cannot open another doorphone, for example, at work. And if this key is registered at work, then it supposedly will stop opening the intercom at the entrance. In fact, in the process of programming, nothing is written into the key itself.
At the factory, a unique code is sewn into each key. During programming, this code is written into the intercom memory (where the key codes of your neighbors are already stored). After that, the intercom considers this key "his" and opens the door.
So, be sure, if you recorded your key in your mistress's intercom, then your home intercom will never know anything about your adventures.
Where do the doubts come from then? Many have probably come across the fact that the key from one intercom does not fit another intercom. But this is not at all due to the fact that the key is already "taken". It's just that a key of one type (for example, Cyfral), in principle, is not compatible with other intercoms (for example, Eltis), even if this key has not yet been registered anywhere.
Another reason for doubt is the appearance along with ordinary keys, the so-called. "Blanks". You can assign any code to the "blank" yourself. But this does not change the essence - the code of the blank (which must be assigned to it in advance) is written into the intercom memory in the same way as the code of a regular key. The intercom does not make any entries in the memory of the blank.
Can the intercom keys be demagnetized?
Answer: No. The intercom key cannot be demagnetized. But it can fail for another reason.
More details: Access keys are called "magnetic keys" or simply "magnetic keys" by mistake. There is nothing magnetic either in the intercom "tablets", or in the access cards, or in the key fobs. Accordingly, they themselves do not magnet and are not afraid of ordinary magnets. I tried to "demagnetize" the EM-Marine format card and the Dallas touch memory key with a powerful neodymium magnet, but both the key and the card were fully operational. They didn't even stick to the magnet. Of course, a key, like any electronic device, can be disabled by powerful electromagnetic radiation, for example, in a microwave. Throw a card at Orodruin with about the same success.
Where do the doubts come from then? At one time, it was magnetic keys that were used in access control systems. Even now, the entrance to some banks is provided by a bank magnetic card. By the way, you can demagnetize a bank magnetic card.
Keys often fail. "Pills", for example, are killed by static electricity. Carrying your contactless card in your back pocket will cause the card to crack and stop working on regular squats. Most often, it is this ailment that is called "demagnetization". When a failed key is brought to a technician or administrator, he does not "re-magnetize" it, but gives a new one.
From frequent use, contact keys of the "tablet" type are recessed in the holder and stop contacting the reader. Here, too, there can be no question of demagnetization. Just push the pill in the opposite direction ↓
What types of keys are there?
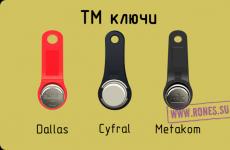
Contact keys. Official name Touch memory (abbreviated TM) or iButton. Common name: "pills". The TM key code is transmitted over one pair, this transmission protocol is called "1-Wire". And about the sad thing - about incompatibility. There are several formats for TM keys:
- Dallas. In most cases, TM refers to a key from the Dallas family (for example, DS1990A). Many devices work with these keys: Eltis, S2000-2, etc.
- Cyfral. These intercoms work only with DC2000A and Tsifral-KP1 keys.
- Metakom. Keys K1233KT2 have been developed for these intercoms. These keys work for many other controllers as well.
- Resistive. There are exotic intercoms that work with resistive keys. Instead of a code, resistance is read from them. No doubt these are contact keys, but I would not call them Touch memory.

Proximity keys. Official name RFID... Produced in the form of cards, key rings, bracelets, etc. The common name is "cards" and "drops" (key rings). Keys operating up to 10-15 cm are called Proximity (short-range), and those operating up to 1 m - Vicinity (long-range). In intercoms, only Proximity keys are used, and this term has become almost synonymous with a "proximity key".

In the world of Proximity, there is also no uniformity of formats:
- EM-Marin is the most popular format today.
- HID- an aksakal among contactless keys.
- MIFARE- a promising format. This is what contactless smart cards belong to.

Magnetic cards. Exotic. Until now, magnetic bank cards provide access to some banks. Were not seen anywhere else. magnetic keys are often referred to as TM and RFID keys.
Ferrite keys. In fact, these are magnetic keys used in exotic intercoms manufactured by Safe-Service.
Optical keys. A relic that is irrevocably a thing of the past. They were used in domestic intercoms at the turn of the 1990s. The optical key is a metal plate with holes drilled in it in a certain order. For reading, the key was placed in a slot with photocells. There could be no question of authorization, the controller only evaluated the key according to the “friend / foe” principle, having absolutely no idea who provided it - the residents of the entire entrance had exactly the same keys. In addition, such an intercom was successfully opened with a flattened belomorina.
About the compatibility of keys and intercoms
1.With which keys the intercom will work depends on its reader -.
2. In addition, the key format must match, for example, EM-marin or Mifare. It is not always possible to distinguish between them by their appearance.
3. Modern intercoms "Visit" with contactless readers only support branded visit contactless keys. Intercoms from other manufacturers do not care - they work with both simple and visit keys.
What is a clone? What is a blank or blank?
Answer: A clone is a copy of another key. A stub is an empty key (does not contain any code) for creating a clone. While the blank is empty, it cannot be written into the controller's memory.
More details: In the usual way, the code is stitched at the factory. You can write any code into the workpiece yourself using a special device - a duplicator. It is the blanks that are used in key making workshops when you ask to copy your "tablet". The copied key is called a clone or duplicate. All those intercoms that opened with the original key will greet his clone as their own. The exceptions are intercoms with a clone filter.
The blank should not be confused with a regular key that has not yet been registered in the controller.

Facts:
- Blanks can be recordable and rewritable in full analogy with CD-R and CD-RW discs, respectively. There is even a term “finalization”.
- If you have many clones of the same key, then it is enough to register any of them in the controller memory. All clones and the original will acquire the same access rights in this controller, since they will all look the same for him. With no clone filter.
- In time attendance systems, all clones will be registered under the same surname.
- By mistake, a blank key is often called a regular key, which has not yet been registered in the controller.
- Key cloning has been associated with a long-standing war between doorphone manufacturers and blank manufacturers. The former come up with new ways to filter and ignore clones, the latter are looking for ways to bypass the filtering. The end and the edge of this war is not visible.
Security Question. By answering it correctly, you will be sure that everything is clear with the blanks.
The person has an electronic key to the office intercom. Just in case, the person made a clone of this key and left it at home. While the man with his key was at work, an intercom was installed at the entrance of the house. The wife of that man was going to leave and, worrying that her husband would not get into the entrance in the evening, gave the technician a clone of the key and asked to register it in the intercom. Then she called her husband at work and said that an intercom was installed at home and its key should already work. Do you think she made the right decision? Will the husband open the intercom in the evening with his work key?
What is a Master Key? Where can I get it? How is a master key different from a regular key?
Answer: The master key does not open the door by itself, but allows you to add opening keys to the controller.
More details: Do not assume that this is a special key format that must be purchased separately. Just a controller introduced into a special mode, an arbitrary key is taken from the purchased armful and is written into the controller's memory in the same way as simple keys, and then the tag “Master. Do not give it to anyone! " For the controller, the difference between a regular key and a master is only in the fact that the status “Master” is assigned to its code in the memory cell. Note that no electronic mark “Master” is entered into the key itself. And he will be a master only for this controller. For another, unfamiliar with this controller key, our master will be nothing. I will say more: the same key can be a master for one controller, and a simple opening key for another. Controllers will not even know about such duplicity of this key.
Of course, when operating multiple controllers, there is no need to create an individual master key for each controller. One single master key can be made for several controllers.
The master key should not be confused with the "all-terrain vehicle" - a simple opening key written in all controllers of the given object.
Where does this question come from? Some units come with a factory-recorded master key to facilitate commissioning. But in most cases, it remains possible to register a new master key if the factory key has been lost.
What is a blocking key?
Answer: The owner of the blocking key can enter the room himself, but after the passage, access to the room for everyone else will be closed. The door can be opened with this or another blocking key, and the blocking will be released. Also, the lock can be removed with a master key.
More details:"Blocking key" - a key status provided in some (not all!) Controllers, for example, in. The key is written to the controller as blocking if the controller is in the block-key adding mode. There were cases when the blocking key was created by accident (before the key was written, the controller was mistakenly entered into the wrong mode) and was issued to one of the users. Honest people could not understand in any way why access to this or that door periodically disappears. At the same time, the happy owner of such a key about the problem is neither sleep nor spirit. All the doors are open to him!
Why is this at all? For example, the director wants to be alone with the secretary in his office. I attached the block key, went into the office and was sure that no one would bother me anymore.
Universal Key - Truth or Deception?
Answer: Truth. A universal (within certain limits!) Key can be created.
More details: There are several completely different ways to create a generic key.
What is iButton Memory Module?
Answer: This is a DS1996 (L) model key to copy and transfer all keys from one controller to another. Like a USB flash drive, only it looks exactly like a DS1990A pin key.
More details: Some controllers provide a mode for transmitting all recorded codes to the memory module and a receive mode. This is convenient for transferring keys when replacing a controller or for writing keys if several controllers are installed on the site and all users have the same access level. The capacity of the memory module is 64 kilobits. It is easy to calculate that with the volume of one code of 64 bits, exactly 1024 keys can be written into the memory module.
Where exactly are the keys registered in the intercom stored?
Generally speaking, keys are stored in the controller's memory. The controller can be either a separate device hidden from the user's eyes, or built into a calling device or a reader, and then it is, as it were, in plain sight.
- Controllers as separate devices:, Gate, S2000-2, S2000-4, I would like to know your opinion and recommendations.
Thank youAnswer
Perhaps these keys were clones. If an anticlone was installed in the intercom, then the clone keys quite naturally stopped working.
Contact your intercom service provider. Be prepared for the fact that they will decide that you just want to add a foreign key to the intercom for free. Unfortunately, sometimes this is really tricky.
The only recommendation for storing contact keys is to protect them from static electricity.Answer
A strange case. Is there any reaction to the key? It can be removed from the controller's memory. If the key is not dirty, and there is no reaction to it, then the key is out of order irrevocably.
Answer
Good afternoon.
The key "tablet" lay on the shelf of the sideboard for 2 months and stopped working (open / close the lock).
Tell me, is it possible to restore its performance?
Thank you
Answer

The stylus-nozzle for the nose is a gadget for those who constantly dreamed of having an extra finger on their face ...

Titan Sphere is a product of the soon-to-go bankrupt company SGRL, a failed attempt to redefine the joystick industry ...

The sockets for eye drops allow you to accurately aim at the eye, at the time when it is necessary to order it with something ...

Are there really unnecessary organs? It is unlikely that anyone wants to part with their appendix while he ...

The Mother of All Demons, 1968 ...

A future with aliens - why not? Some are sure that aliens are already among us ...
 23.05.2012

A simple effective duplicator of intercom electronic keys with a working scheme is considered. The video shows the check and the finished assembly in operation. There are many good schemes for this function on the network, but, firstly, they are complex, and secondly, not all of them work.
The creator of this video lesson tried to assemble a duplicator of keys on the Arduino designer, but it is not known why he did not succeed, despite the fact that there is a video on the network showing a working device on an Arduino.
There are factory duplicators on sale, but they are quite expensive, and for those who are not going to always work on this device, there is no need to buy them. Since it is not every day that amateurs need to duplicate keys for an intercom. It was decided to make a simple duplicator easy to expand your own horizons.
Many blanks were purchased on Aliexpress, they are inexpensive. A simple scheme was found for the duplicator, which can be assembled in almost 5 minutes. The blanks were bought in this Chinese store, in the same place there is a programmer necessary for the operation of the device.
the discussion and the Scheme on the forum of this duplicate here. The base or heart of this copier is a microcontroller.
Suitable 628, 648 or 88. Of course, if you easily assemble the device, it will not work. It is necessary to write a program to this microcontroller. This requires a programmer that connects to the computer for firmware.
On the net it is possible to find instructions for using the programmer. It costs 10-15 dollars. Any novice radio amateur will be able to live with this microcontroller and repeat this duplicator circuit.
As you can see in the diagram and photo, there are 3 LEDs in the diagram - red, yellow and green.
The red LED lights up when there is power to the assembly itself; yellow is on when it is in key reading mode. And green lights up, when the recording or duplication of the key was successful. The blinking of the LEDs occurs at a time when the workpiece is one-time, non-rewritable.
All presets bought on AliExpress are rewritable.
The entire circuit is powered by 5 volts. A 5-volt stabilizer was supplied to this design, so that when a voltage of 5 to 9 volts is applied, it always has only 5 volts at the output. The key duplicator itself is powered by 5 volts.
Let's turn on and see how this device works. We turn on the power supply. All the LEDs lit up, in other words the device has booted up.
We attach the copied key, the indicator has shown reading. There is a button to duplicate this key. We apply a blank blank, the LED has shown that a duplication has happened. For the experience, the elevator key was copied and checked.
The result is good, the self-assembled duplicator does an excellent job.
Second part
Random entries:
Simple duplicator of intercom keys for arduino nano.
Each key for the intercom has its own number - it is this number that serves as the key identifier. It is by the number of the key that the intercom decides - your own or someone else's. Therefore, the copying algorithm is as follows: first you need to find out the number of the allowed key, and then assign this number to another key - a clone. It makes no difference for the intercom whether the original key or its copy was attached. After checking the number with his authorized number database, he will open the door.
The keys for the intercom, which we will connect to the Arduino (they are sometimes called iButton or Touch memory) are read and written on a single-wire 1-wire interface... Therefore, the wiring diagram is very simple. We only need a pair of wires and a 2.2K pull-up resistor. The connection diagram is shown in the figure.
The assembled diagram might look something like this:

2 Reading iButton Key ID using arduino
To work with the 1-wire interface, there are ready-made libraries for Arduino. You can use, for example, this one. Download the archive and unpack it into a folder / libraries / located in the Arduino IDE directory. Now we can very easily work with this protocol.
Load this sketch into Arduino in the standard way:
Sketch of reading iButton key using Arduino(unfolds) #includeThis sketch shows the key number for the intercom, which is connected to the circuit. This is what we need now: we need to find out the number of the key we want to make a copy of. Connect Arduino to your computer. Let's start the serial port monitor: Tools Serial Port Monitor(or the keyboard shortcut Ctrl + Shift + M).
Now let's connect the key to the circuit. The port monitor will show the key number. Let's remember this number.

And here is what exchange takes place on a single-wire line when reading the key identifier (more details later):
The figure, of course, does not show all the implementation details. Therefore, at the end of the article, I attach a timing diagram in * .logicdata format, taken using a logic analyzer and a program Saleae Logic Analyzer and revealed to her. The program is free and can be downloaded from the Saleae official website. To open the * .logicdata file, you need to run the program, press the combination Ctrl + O or in the menu Options(located at the top right) select item Open capture / setup.
3 Dallas Key ID Entry using arduino
Now let's write a sketch for writing data to the iButton key memory.
IButton key recording sketch using Arduino(unfolds) #includeDon't forget to set the number of your original key in the array key_to_write that we learned earlier.
Upload this sketch to Arduino. Let's open the serial port monitor (Ctrl + Shift + M). Let's connect a key to the circuit, which will be a clone of the original key. The serial port monitor will display a message on the result of the programming.
If this sketch didn't work, try replacing the code after Serial.print ("Start programming ...") to the end of the function loop () to the next:
Additional sketch of writing iButton key using Arduino(unfolds) delay (200); iButton.skip (); iButton.reset (); iButton.write (0x33); // reading the current key number Serial.print ("ID before write:"); for (byte i = 0; i<8; i++){ Serial.print(" "); Serial.print(iButton.read(), HEX); } Serial.print("\n"); iButton.skip(); iButton.reset(); iButton.write(0xD1); // команда разрешения записи digitalWrite(pin, LOW); pinMode(pin, OUTPUT); delayMicroseconds(60); pinMode(pin, INPUT); digitalWrite(pin, HIGH); delay(10); // выведем ключ, который собираемся записать: Serial.print("Writing iButton ID: "); for (byte i=0; i<8; i++) { Serial.print(key_to_write[i], HEX); Serial.print(" "); } Serial.print("\n"); iButton.skip(); iButton.reset(); iButton.write(0xD5); // команда записи for (byte i=0; i<8; i++) { writeByte(key_to_write[i]); Serial.print("*"); } Serial.print("\n"); iButton.reset(); iButton.write(0xD1); // команда выхода из режима записи digitalWrite(pin, LOW); pinMode(pin, OUTPUT); delayMicroseconds(10); pinMode(pin, INPUT); digitalWrite(pin, HIGH); delay(10); Serial.println("Success!"); delay(10000);Here the function writeByte () will be as follows:
int writeByte (byte data) ( int data_bit; for (data_bit = 0; data_bit<8; data_bit++) { if (data & 1) { digitalWrite(pin, LOW); pinMode(pin, OUTPUT); delayMicroseconds(60); pinMode(pin, INPUT); digitalWrite(pin, HIGH); delay(10); } else { digitalWrite(pin, LOW); pinMode(pin, OUTPUT); pinMode(pin, INPUT); digitalWrite(pin, HIGH); delay(10); } data = data >> 1; ) return 0; )It makes no sense to show the timing diagram of the operation of the key identifier record sketch, since it is long and will not fit in the picture. However, I attach the * .logicdata file for the logic analyzer program at the end of the article.
Intercom keys are of different types. This code is not suitable for all keys, but only for RW1990 or RW1990. 2. Programming keys of other types can lead to key failure!
If desired, you can rewrite the program for a different type of key. To do this, use the technical description of your key type (datasheet) and change the sketch in accordance with the description. Download datasheet for iButton keys can be found in the appendix to the article.
By the way, some modern intercoms read not only the key identifier, but also other information recorded on the original key. Therefore, making a clone by copying only the number will not work. You need to completely copy the key data.
4 Description of single-wire 1-Wire interface
Let's take a deeper look at the One-wire interface. In terms of organization, it is similar to the I2C interface: it must also contain a master device (master) that initiates the exchange, as well as one or more slave devices (slaves). All devices are connected to one common bus. IButtons are always slaves. A microcontroller or a PC most often acts as a master. The data transfer rate is 16.3 kbps. The bus is in idle state in logic "1" (HIGH). This protocol provides only 5 types of signals:
- reset pulse (master)
- presence pulse (slave)
- write bit "0" (master)
- write bit "1" (master)
- read bit (master)
1) Initialization
Initialization consists in the fact that the master sets the RESET condition (for a time of 480 μs or more, it lowers the line to "0", and then releases it, and due to the pull-up resistor, the line rises to the "1" state), and the slave no later than 60 μs after that, it must confirm the presence, also lowering the line to "0" for 60 ... 240 μs and then releasing it:

2) Commands for working with ROM
If after the initialization pulse the acknowledgment signal is not received, the master repeats the bus poll. If the confirmation signal arrives, then the master understands that there is a device on the bus that is ready for exchange, and sends it one of four 8-bit commands for working with ROM:
(*) By the way, there are quite a few families of iButton devices, some of them are listed in the table below.
IButton family codes(unfolds)| Family code | IButton devices | Description |
|---|---|---|
| 0x01 | DS1990A, DS1990R, DS2401, DS2411 | Unique serial number-key |
| 0x02 | DS1991 | Multi-key, 1152-bit protected EEPROM |
| 0x04 | DS1994, DS2404 | 4KB NV RAM + clock, timer and alarm |
| 0x05 | DS2405 | Single addressable key |
| 0x06 | DS1993 | 4 KB NV RAM |
| 0x08 | DS1992 | 1 KB NV RAM |
| 0x09 | DS1982, DS2502 | 1 kb PROM |
| 0x0A | DS1995 | 16 KB NV RAM |
| 0x0B | DS1985, DS2505 | 16 kB EEPROM |
| 0x0C | DS1996 | 64 kb NV RAM |
| 0x0F | DS1986, DS2506 | 64 kB EEPROM |
| 0x10 | DS1920, DS1820, DS18S20, DS18B20 | temperature sensor |
| 0x12 | DS2406, DS2407 | 1 kB EEPROM + dual channel addressable key |
| 0x14 | DS1971, DS2430A | 256 bit EEPROM and 64 bit PROM |
| 0x1A | DS1963L | 4 KB NV RAM + write cycle counter |
| 0x1C | DS28E04-100 | 4 KB EEPROM + dual channel addressable key |
| 0x1D | DS2423 | 4 kb NV RAM + external counter |
| 0x1F | DS2409 | Two-channel addressable key with the ability to switch to the return bus |
| 0x20 | DS2450 | Four-channel ADC |
| 0x21 | DS1921G, DS1921H, DS1921Z | Thermochronous sensor with data acquisition function |
| 0x23 | DS1973, DS2433 | 4 KB EEPROM |
| 0x24 | DS1904, DS2415 | Real time clock |
| 0x26 | DS2438 | Temperature sensor, ADC |
| 0x27 | DS2417 | Real time clock with interruption |
| 0x29 | DS2408 | Bi-directional 8-bit I / O port |
| 0x2C | DS2890 | Single channel digital potentiometer |
| 0x2D | DS1972, DS2431 | 1 kB EEPROM |
| 0x30 | DS2760 | Temperature sensor, current sensor, ADC |
| 0x37 | DS1977 | 32KB password protected EEPROM |
| 0x3A | DS2413 | Dual Link Addressable Switch |
| 0x41 | DS1922L, DS1922T, DS1923, DS2422 | High resolution thermochronous and hygrochronous sensors with data acquisition function |
| 0x42 | DS28EA00 | Digital thermometer with programmable resolution, serial mode and programmable I / O ports |
| 0x43 | DS28EC20 | 20 kB EEPROM |
Data is transmitted sequentially, bit by bit. The transmission of each bit is initiated by the master. When recording, the presenter lowers the line to zero and holds it. If the line hold time is 1 ... 15 µs, then bit "1" is written. If the holding time is 60 µs or more, the bit "0" is written.
Reading of bits is also initiated by the master. At the start of reading each bit, the master sets the bus low. If the slave device wants to transmit "0", it holds the bus in the LOW state for a period of 60 to 120 μs, and if it wants to transmit "1", then for about 15 μs. After that, the slave releases the line, and due to the pull-up resistor, it returns to the HIGH state.
This is how, for example, the timing diagram of the Search ROM (0xF0) command looks like. Bit write commands are marked in red in the diagram. Pay attention to the order of the bits when transmitting on 1-Wire: the most significant bit is on the right, the least significant bit is on the left.

3) Commands for working with EPROM
Before considering the commands for working with the iButton EPROM, it is necessary to say a few words about the memory structure of the key. The memory is divided into 4 equal sections: three of them are intended for storing three unique keys, and the fourth is for temporary data storage. This temporary buffer serves as a kind of draft, where data is prepared for writing keys.

There are 6 commands for working with EPROM:
| Name | Team | Appointment |
|---|---|---|
| Write to temporary buffer (Write Scratchpad) | 0x96 | Used to write data to a temporary buffer (scratchpad). |
| Read from temporary buffer (Read Scratchpad) | 0x69 | Used to read data from a temporary buffer. |
| Copy from temporary buffer (Copy Scratchpad) | 0x3C | Used to transfer data prepared in a temporary buffer to the selected key. |
| Write down the key password (Write Password) | 0x5A | Used to record the password and unique identifier of the selected key (one of three). |
| Write SubKey | 0x99 | It is used to write data directly to the selected key (bypassing the temporary buffer). |
| Read SubKey | 0x66 | Used to read the data of the selected key. |
4) Data transmission
To be continued...
5 Possible mistakes when compiling a sketch
1) If an error occurs when compiling the sketch WConstants.h: No such file or directory #include "WConstants.h", then, as an option, it follows in the file OneWire.cpp replace the first block after the comments with the following:
#include
2) If you get an error when compiling class OneWire has no member named read_bytes, then find and try a different library to work with the OneWire interface.
Almost every entrance of a modern apartment building is equipped with a specialized intercom device. This is very good, because the safety of residents begins precisely from the entrance, but the trouble is that residents periodically lose their keys, after which they cannot get back into the house. This is what a duplicator of intercom keys is for.
What are the principles of equipment operation?
Key duplication is now considered a pretty lucrative business. In order to be able to make a copy of the chips corresponding to the original, it is necessary to use specialized equipment.
A standard key duplicator works from a regular computer. In this case, the connecting port is the USB port.
The photo shows an example of a copier
To quickly understand the principles of operation of the key copier for the intercom, you need to find out that each chip tablet contains an individual code. The unique coding is written into its memory at the factory during the production of the product, and the cipher cannot be changed in the future.
It is known that copying keys for certain intercom devices looks something like this:
- First, the installation wizard dials a specialized code on the calling panel, which is necessary to enter the doorphone service menu and, in order to copy the key, switches the entire system to a special chip reading mode;
- Then he brings each intercom key with the recorded necessary information to the reader;
- The intercom itself records the codes, which it reads from these intercom keys into its own memory.
As a result of these actions, when the key from the intercom is brought to the device, the equipment reads its code, and if this chip has already been recorded in its memory, then the lock will open and you can freely enter the entrance.
Knowing the procedure for registering codes in the intercom device, you need to figure out how to copy the code itself. First of all, you need to prepare for this: you need to take a few blank discs and a laptop or PC.
Although, in order to make a duplicate of the key from the intercom, you can use another method and use a specialized duplicator. Such a device can duplicate codes and operates from a regular network or a special battery "krona".
 The photo shows the use of a copier
 What is the purpose of duplicators?
It is known that the copier uses working electronic chips to read and then copy the codes onto specialized compatible blanks. Any number of such duplicates can be made.
The latest models of copiers provide the ability to make magnetic keys for the intercom in the following formats:
- Two-pin (using the TM protocol);
- Contactless cards or key fobs;
- Rarely used three-pin chips.
They support a fairly wide range of presets:
- Two-contact blanks;
- Universal;
- Three-pin square;
- Contactless RFID.
The read code can only be written to specialized workpieces, because factory identifiers are not intended for writing new codes.
Key features of the copier
The following capabilities of the device can be distinguished:
- Many duplicators offered on the modern market operate from power supplies that come with them or from separate batteries;
- The most advanced models can work with a computer, and if the appropriate software is installed, it will be possible to maintain the necessary database in which each copy of the key will be described in detail. In addition, the possibility of direct communication with the computer greatly facilitates the process of updating the firmware, thus contributing to the expansion of the copier's capabilities;
- Universal duplicators, which are contact-free, have a specialized platform for reading or writing contact-type chips on their case. You can also make a copy of the non-contact type key using the appropriate area;
- Some models offered on the modern market provide the ability to visualize the process of chip copying using specialized built-in displays;
- Many models have independent memory for a selected number of codes, which makes it possible to organize a real database, recovering lost copies even in the absence of the original.
The video shows the work of the key duplicator:
Duplicators offered by the modern market provide an opportunity for each ordinary user to copy the key on their own in case of loss, without being tied to the company that installed the intercom device.
In addition, with the help of these devices, you can increase the number of intercom chips used.
Thus, each person can remove the limitation on the maximum number of chips for one user or for all residents of the house.
The market is constantly expanding, so the demand for such devices is increasing, and the cost of duplicating keys is falling, which is very beneficial for ordinary users.